Using Conversation Customization Features

Easily Customize your Conversational Interface with Visual Customization Options.
With Botmock, beyond setting up conversational content and stringing together moving parts, we now have a few new features that allow for extra customization within certain projects.
Using Visual Customizations

For all of your project types, you have a few specific options that can be customized on a project-by-project basis. These changes are then reflected in both the "Run" Tab and in Usability Testing.
These options include:
Avatar: This will change the avatar or "icon" that represents the bot in a conversation.
Background Image: This will change the background behind the actual conversational interface, which can allow for representations of the chatbot in different contexts, and can also allow for further custom branding.
Disable Microphone Input: Marking this checkbox will remove any way of trying to input any values into the "Run" tab or Usability Testing using a microphone.
Send Button Background Color: This will change the background color of the Send Button that appears in both the "Run" tab and Usability Testing.
Send Button Text Color: This is the text color of the button itself that will show up in both the "Run" tab and Usability Testing.
Using Advanced Visual Customizations in Generic Projects
In addition to adding a custom header and footer to the layout of Generic Projects, there are other additional "Advanced" Visual Customizations that can be used to further customize the look and feel of a conversational interface. These are only in Generic projects, as other platforms live on different constraints that are specified for each platform, while a Generic Interface can have more flexibility, without constraints.
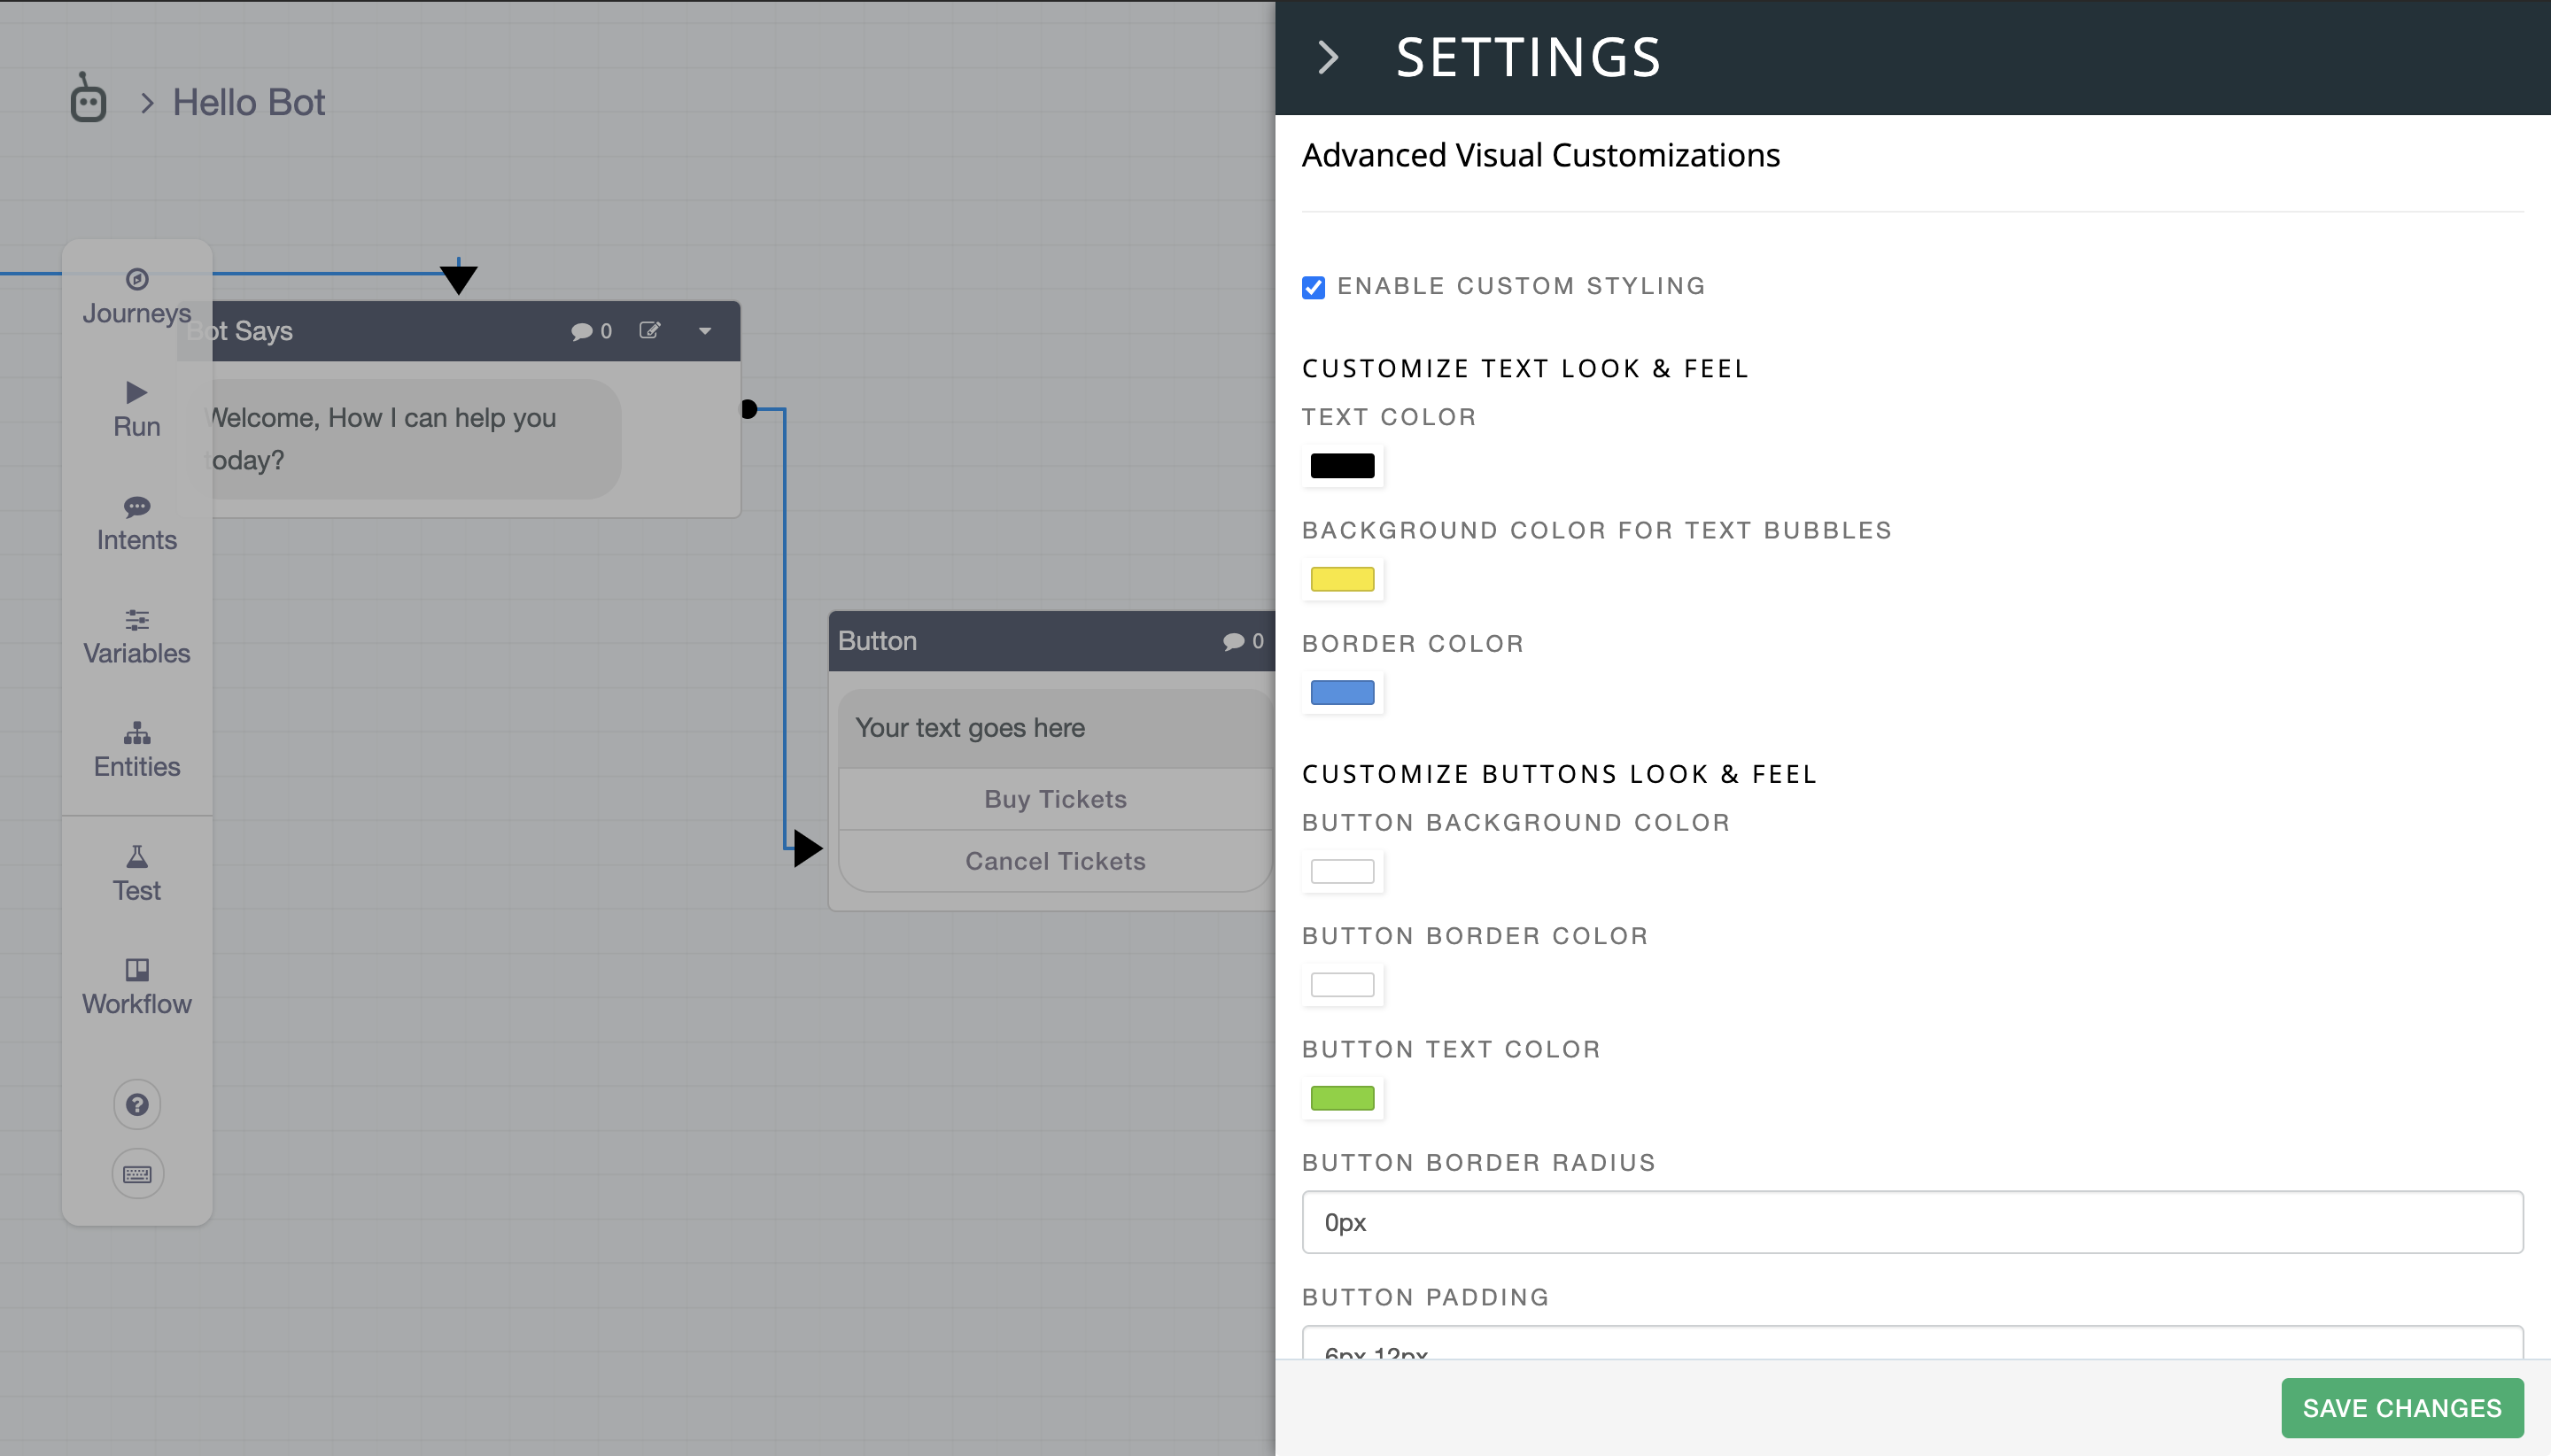
These are the options can be found under the Advanced Visual Customizations:
Text Color: This option will change the text color of all "Bot" text-based messages, which includes cards, lists, and more.
Background Color for Text Bubbles: This will change the background color of all "Bot" Messages/Text Bubbles in the current project.
Border Color: This option will change the border color for all of the "Bot Says" Text Bubbles.
Button Background Color: This option will change the background of all buttons in the project. This includes Buttons in Quick Replies, The Button Block, and the Carousel/Card Block.
Button Border Color: This option will change the border for every button in the project. This includes Buttons in Quick Replies, The Button Block, and the Carousel/Card Block.
Button Text Color: This option will change the text color of every button in the project. This includes Buttons in Quick Replies, The Button Block, and the Carousel/Card Block.
Button Border Radius: This will change the border radius of every button in the project. A value here needs to be in pixels, or "px".
Button Padding: This option will change the padding of every button in a project. These values need to be in pixels, or "px, in a format similar to css: top(px) right(px) bottom(px) left(px), with the spaces between each option included.
Button Margins: This option will change the margins around every button in a project. These values need to be in pixels, or "px, in a format similar to css: top(px) right(px) bottom(px) left(px), with the spaces between each option included.
User Reply Text Color: This option will change the text color of all "User Reply" content blocks, or any responses that are typed/inputted by microphone in a project.
User Reply Text Background: This option will change the text bubble background color of all "User Reply" content blocks, or any responses that are typed/inputted by microphone in a project.
User Reply Border Radius: This option will change the border radius of all "User Reply" content blocks, or any responses that are typed/inputted by microphone in a project. This value needs to be numerical and in pixels, or "px".
Usability Testing Visual Customizations

When running a usability test, you may want a few extra features in the interface that a user might see when running through a Usability Testing session.
Beyond the other Visual Customizations that you may have made for the overall project, there is one extra setting in Usability Testing to help with customization:
Chat Window Position: This will change the position of the entire "Chat Window" relative to the overall Usability Testing layout. The options are "Normal" (which is centered on the page), "Bottom Right", and "Bottom Left". This can be fairly useful when trying to
Visual Customization in Action for "Run" and Usability Testing
After you have set these visual customization options, you will then be able to see them show up both in the "Flow" editor, and then, when you're running a project, creating Journeys, and using Usability Testing.
Your Conversational Interface for Generic Projects should look something like this when testing:

Do you have any questions or requests about these visual customization features? Feel free to email us at help@botmock.com or reach out to us via Live Chat.


