Working with Intents, Variables, and Entities within your Flow Project

We are glad to introduce NLP integration to our current project flow editor which gives you the ability to test your previews and flows with user interaction. Let us walk you through these new features.
But first, let's discuss some of the building blocks which help you create your first BOT which can evaluate user utterances and move along the conversational flow accordingly.
Intent: An intent is the user’s intention. For example, if a user types “show me yesterday’s financial news”, the user’s intent is to retrieve a list of financial headlines. Intents are given a name, often a verb and a noun, such as “showNews”.
To plan the Intents for your chatbot, you need to consider what your customers might want to do, and what you want your chatbot to be able to handle. Choosing the correct intent for a user's input is the first step in providing a useful response. The intents you identify for your application will determine the dialog flows you need to create.
Entity: An entity modifies an intent. For example, if a user types “show me yesterday’s financial news”, the entities are “yesterday” and “financial”. Entities are given a name, such as “dateTime” and “newsType”. You can create as many as values as you want under each entity.
Variables: Variables let you store values of some entities that a bot can use at a later point in the conversation. You can create as many variables as you would like per project.
Let's build a Restaurant Bot prototype together using these features to have a better understanding. Our bot should be able to handle queries like Table Reservation and Restaurant Timings.
Create a new Flow Project on the Amazon Alexa Platform.

Notice a menu bar on the left side of the editor where you can define Intents, Entities, and Variables.

Create Entities:
We need our bot to be able to identify user requests for table reservations for dinner or lunch, so for that, we can create an entity "LunchOrDinner".

To better train your NLP model, add as many synonyms as you can. Our first entity, "LunchOrDinner" can have two values i.e lunch or dinner. We have added synonyms that a user/tester can use.

Create Variables:
The next step is to create a variable. With a variable, we can store this newly created entity value and we can use it whenever we want. We are going to name our variable "ReservationType".

After giving it a name, you'll also have a way to define the Variable Type, which includes text, integer, and boolean.
- Text: A value that includes numbers and letters.
- Integer: A value that only has numbers
- Boolean: A value that can only be "true" or "false"
Using these options, you can properly set up that format you want your data to be captured in.

As you can see, we have set its Entity Type to be "LunchOrDinner" from dropdown. You can also use this field to associate built-in types that are more popular, like Age, Date, Duration etc. based on your needs.
Create Intents:
Now, we need to create relevant Intents. We have identified the following intents for our bot:
- hours_intent
- make_reservation
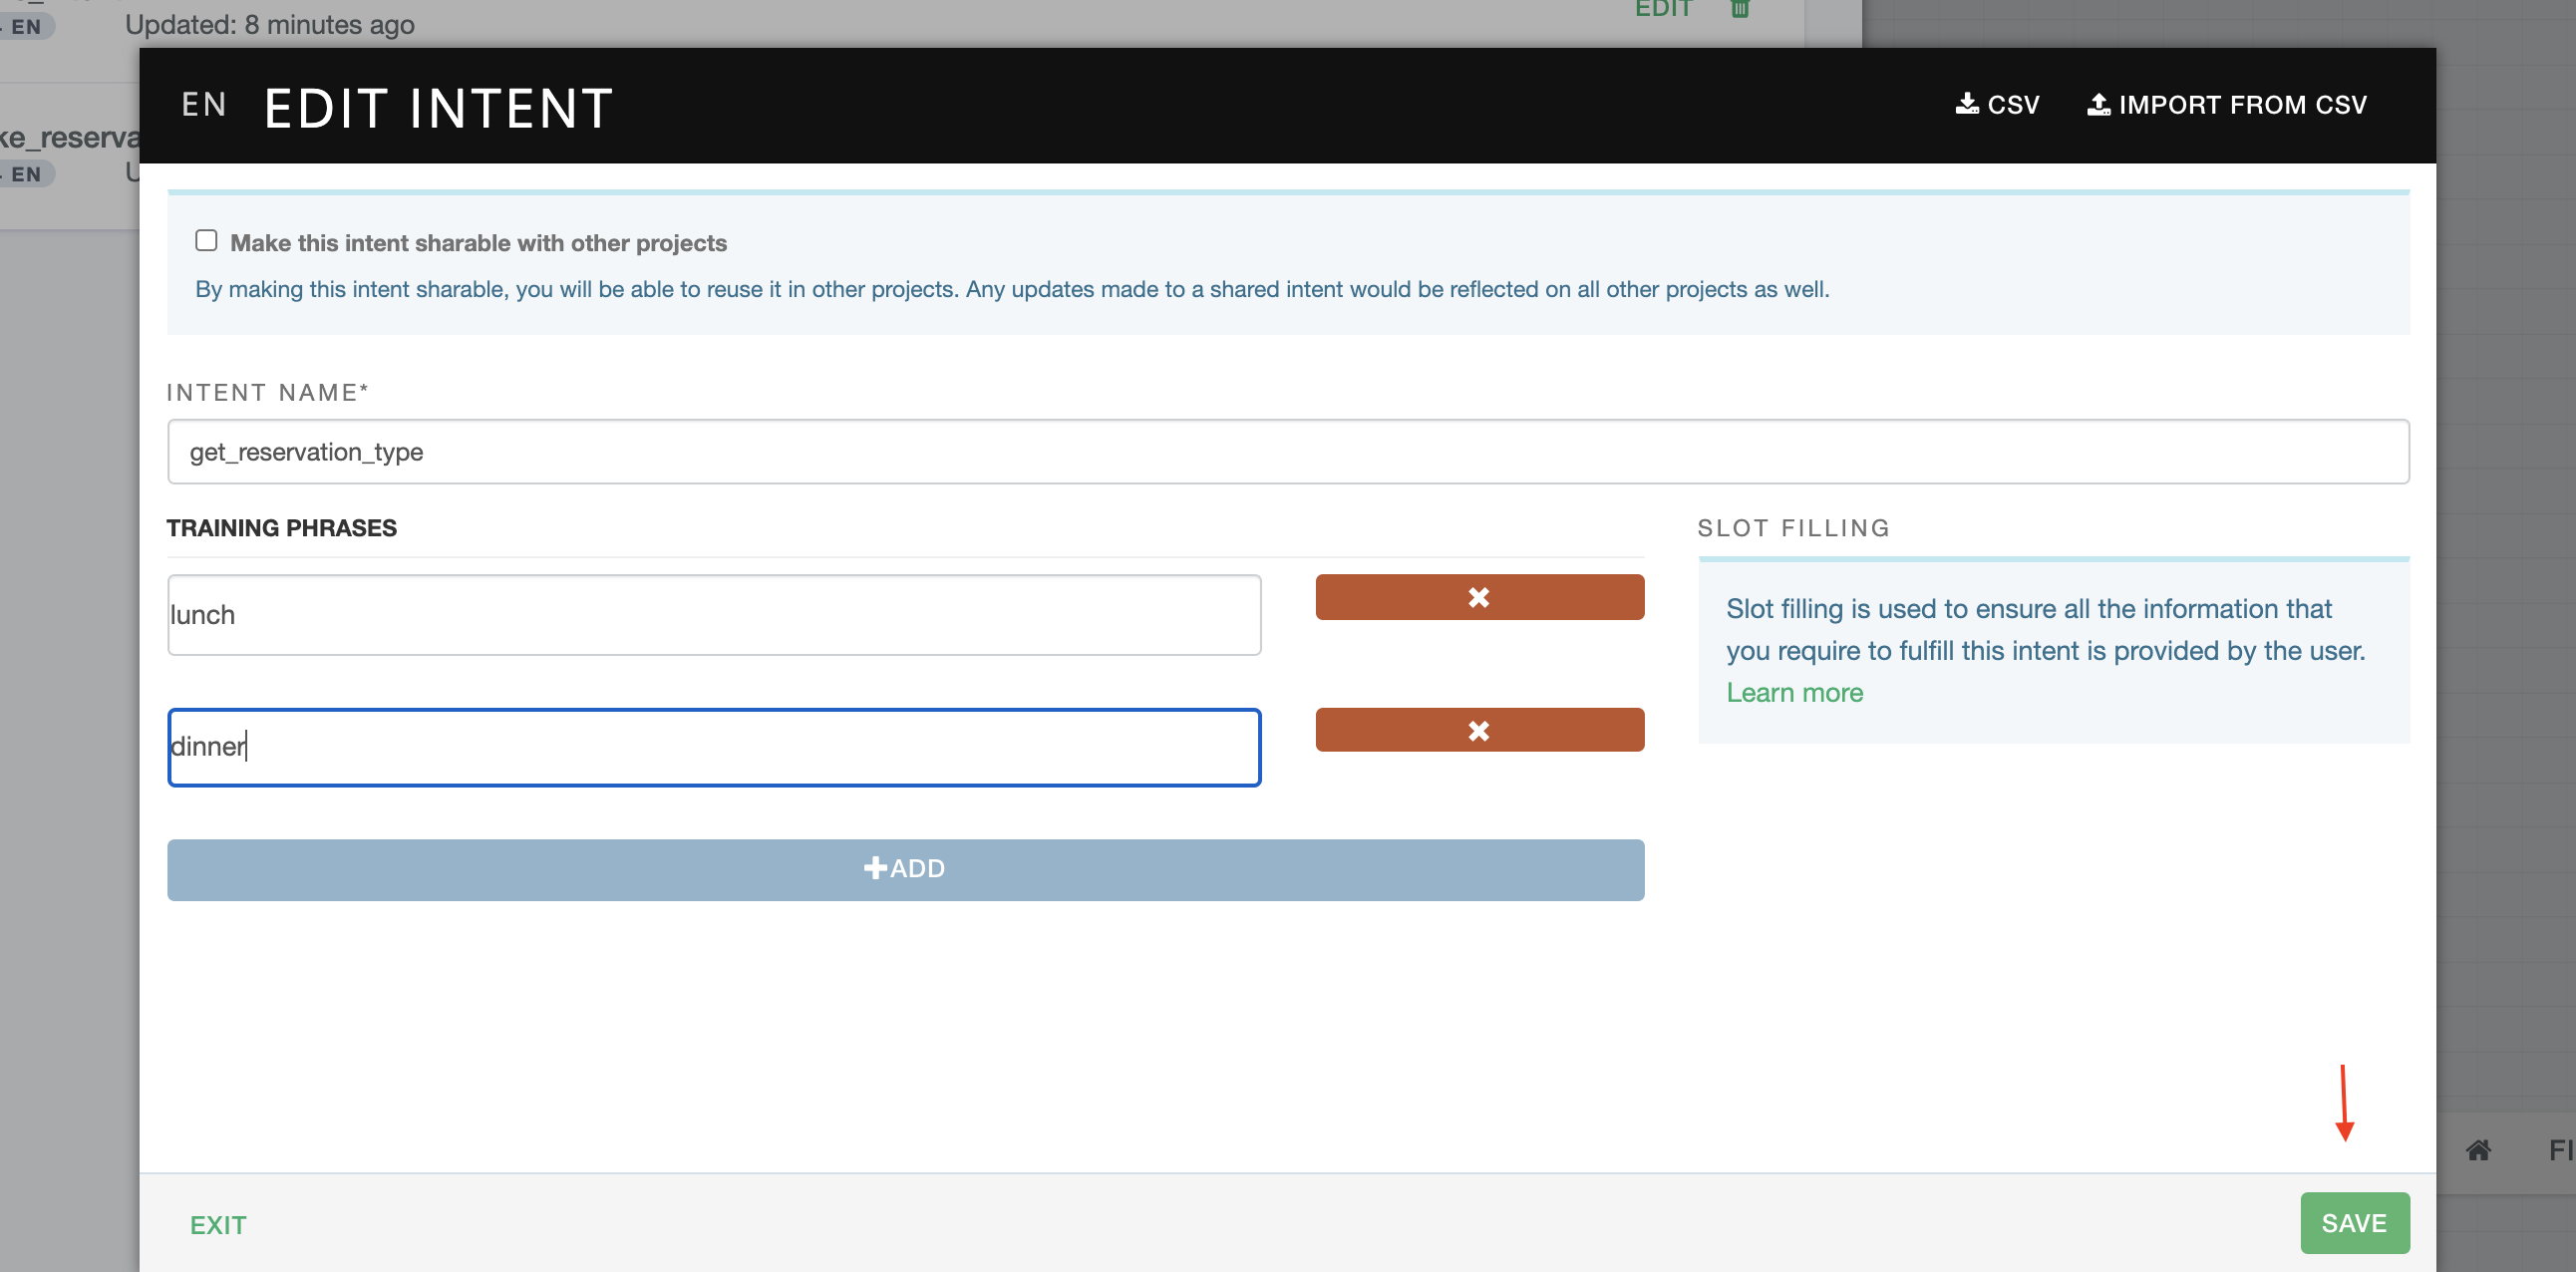
- get_reservation_type

Let's create these intents:

To better train your model, add as many phrases/utterances as you can, that a user/tester can use.
Follow the same process for all your other intents.

Now create message nodes to visualize the flow of our bot.
Attach Intents to a Connector:
Now it's time to connect our intents by indicating their appropriate connections. To do that, click on the connection settings button (see below).

In Connection Settings, select the appropriate intent that you want your bot to evaluate at this point of conversation flow. You can also add conditions with the help of variables at this point.
Once you have associated appropriate intents with all the connectors, your flow editor should look like this:

How to select a Variable:
As you can see in the highlighted text node (see image above), we have used a variable %ReservationType% which we created earlier. To select a variable in a text node, type % and a list of all the variables will appear. You can select your desired variable from that list as shown in image below:

Test using Interactive Simulator:
You can now test your bot using our new Interactive Simulator. Just click on the "Test" button from the left side menu and start chatting with your bot. You can use the designated text input field as well as voice commands to record your answers.


